
How to Publish an App on the App Store and Google Play (2026 Guide)

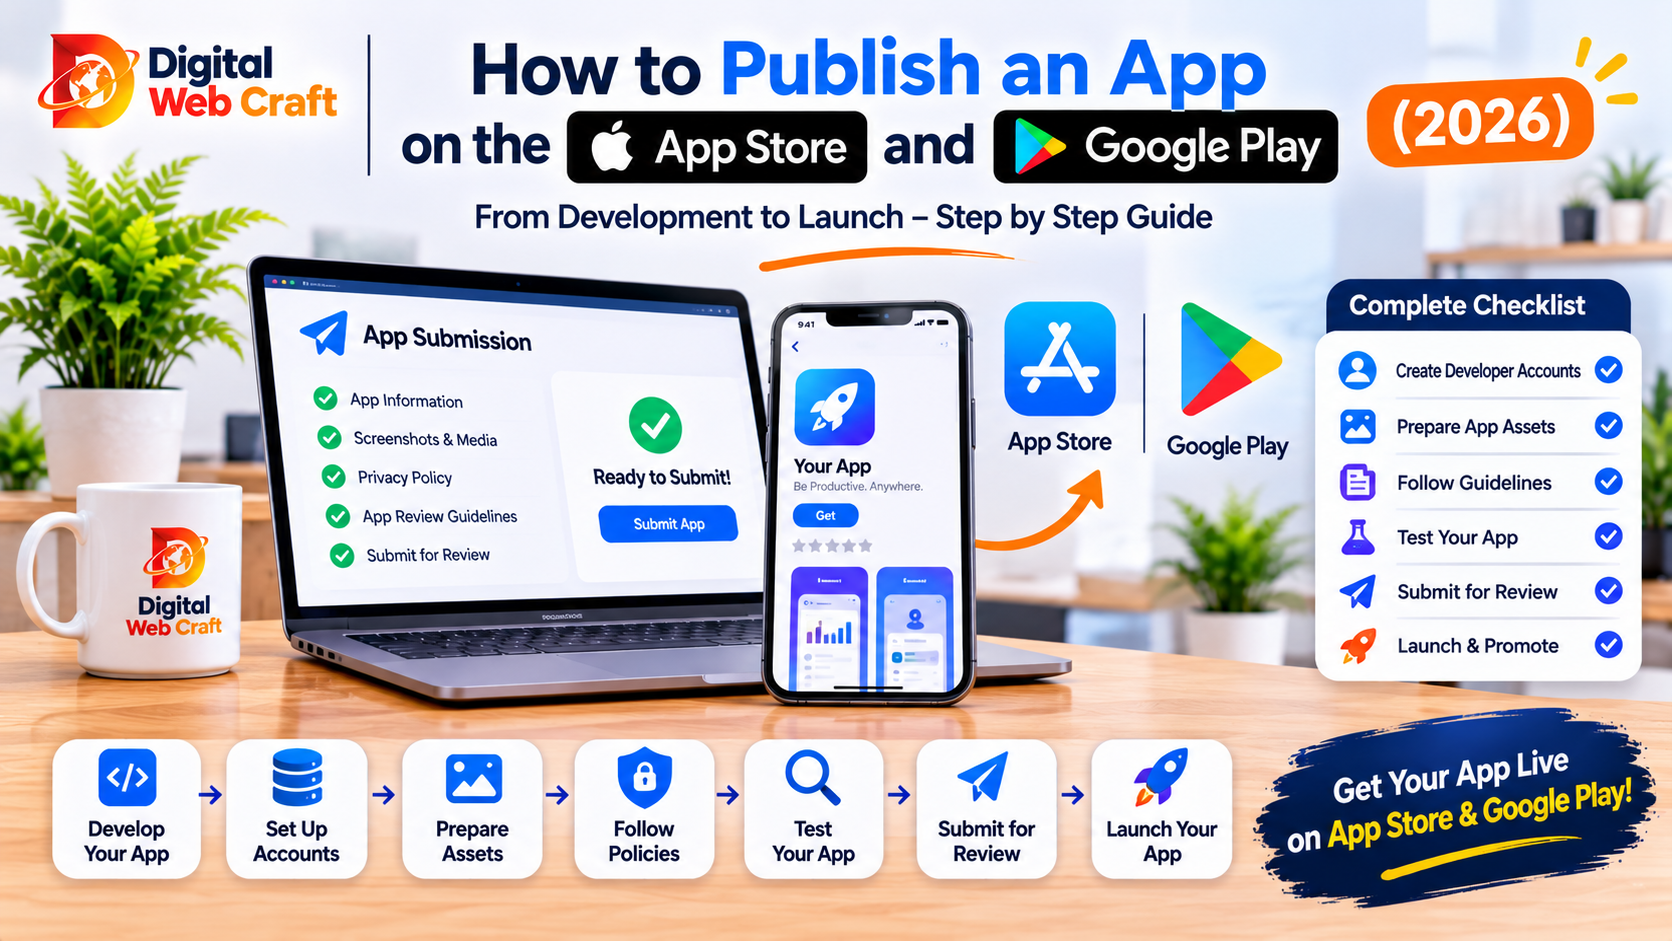
Building the app is only part of the job. To reach real users, it has to pass through two gatekeepers: Apple’s App Store and Google Play. Each has its own accounts, rules, review process and surprises. Many first-time founders lose weeks at this stage because they treated publishing as the last five minutes of the project rather than a project of its own.
This guide walks you through the whole process in order: accounts, preparation, testing, store listings, submission, review and launch. You will also see the most common reasons apps get rejected and how to avoid them. It is written for business owners, not only developers, so you will know what to ask for and what to check.
Key Takeaways
- Publishing involves two separate processes, one for Apple’s App Store and one for Google Play, with different accounts, rules and timelines.
- Set up your developer accounts early, in your own or your company’s name, because verification can take time.
- Own your store accounts and keep the login details safe, since they control your app’s future.
- A privacy policy, accurate data disclosures and proper permission explanations are required and commonly cause rejections.
- Test on real devices and use the stores’ official beta tools before you submit.
- Your store listing, including name, icon, screenshots and description, strongly affects downloads.
- Apple and Google both review apps against published guidelines, so read them before you build, not after.
- Common rejections come from crashes, broken links, missing demo access, misleading descriptions and unclear data use.
- Plan for review time and possible resubmission, and do not tie launch dates or campaigns to the first submission date.
- Launching is the start of updates, reviews, monitoring and improvement.
The Big Picture
Here is the whole journey at a glance:
- Create developer accounts with Apple and Google.
- Prepare the app: final build, privacy policy, data disclosures, icons and legal pages.
- Test: internal testing, then beta testing with real users on real devices.
- Create the store listing: name, description, screenshots, categories and contact details.
- Submit for review on each store.
- Respond to review feedback if needed.
- Release the app, either immediately or on a date you choose.
- Monitor and update: reviews, crashes, performance and new versions.
Apple and Google use different tools. Apple uses App Store Connect for managing apps, and Google uses Google Play Console. Both are web dashboards where you upload builds, write listings, answer compliance questions and track results.
If you are still planning your project and budget, our guide on how much it costs to build a mobile app explains what to include, and our comparison of Flutter and React Native covers one of the main technical decisions.
Before You Start: Is Your App Ready?
Ask these questions before you create accounts or press submit.
- Does the app do what the listing will claim, completely and without crashes?
- Have all placeholder texts, test data and “coming soon” screens been removed?
- Does every button, link and feature work?
- If users can create accounts, can they also delete them from within the app? (Both stores increasingly expect this, so check the current rules.)
- If the app requires a login, have you prepared a working demo account for reviewers?
- Does the app work on a range of devices and operating system versions?
- Are all third-party services (payments, maps, notifications, analytics) set up with production credentials, not test ones?
- Is your backend stable and able to handle real users?
- Do you have a support email or page where users can reach you?
An app that feels unfinished is the easiest to reject, and the hardest to recover from, because first impressions and early reviews stay with you.
Step 1: Create Your Developer Accounts
You need a developer account with each store you want to publish on.
Apple Developer Program
- Required to publish on the App Store.
- Can be enrolled as an individual or as an organisation. Organisations need to verify business details, which can take longer.
- Involves an annual membership fee.
- You manage your apps in App Store Connect.
Google Play Console
- Required to publish on Google Play.
- Also available for individuals and organisations, with identity verification.
- Involves a one-time registration fee.
- Google may have extra requirements for new accounts, such as testing periods or additional verification, so check the current rules early.
Check current rules: Fees, verification steps and testing requirements for new accounts change over time. Read the official pages for each store before you plan your timeline.
Important advice on ownership:
- Register accounts in your name or your company’s name, not your developer’s. If an agency owns your account, you may struggle to move your app later.
- Use a shared company email address that more than one person can access, not a single personal inbox.
- Enable two-factor authentication.
- Add your developer as a team member with the permissions they need, instead of giving them the main login.
- Keep payment, tax and bank details accurate if you will sell anything or earn revenue.
If you are working with an agency, ask them to guide you through this and never agree to publish under their account without a written plan to transfer it later. Our guide on hiring a web developer covers ownership and contract points in more detail.
Step 2: Prepare Your App and Legal Documents
Privacy policy Both stores require a privacy policy if your app collects any user data, and most apps do, including through analytics, crash reporting and advertising tools. It must be hosted on a public web page and explain what you collect, why, how it is used, who it is shared with, how long it is kept and how users can request deletion.
Data disclosures Apple asks you to describe what data your app collects and how it is used, which appears on your listing as privacy information. Google asks you to complete a data safety form. These must match what the app and its third-party tools actually do. Ask your developer to list every SDK and service that touches user data, because inaccurate answers are a frequent cause of rejection or later removal.
Terms of service Recommended for most apps and necessary for apps with accounts, payments or user-generated content.
Permissions Apps must request only the permissions they need (camera, location, contacts, notifications, microphone) and explain why in clear language at the moment of the request. Asking for permissions you do not need can lead to rejection.
Age rating and content You will answer questions about content such as violence, gambling or user-generated content to obtain age ratings. Answer honestly.
Payments and subscriptions If your app sells digital goods or subscriptions, the stores have rules about how payment must be handled and how pricing and renewal terms must be shown. Review the current policies before designing your payment flow, because a wrong approach can block approval.
App icon and branding assets Prepare a high-quality icon and brand assets that meet each store’s requirements. Do not use trademarks or logos you do not have rights to.
Step 3: Test Properly
Testing before submission saves days of back-and-forth later.
Internal testing
- Test on real iPhones and Android phones across different screen sizes and operating system versions, not only emulators.
- Test on slow or unstable connections and in airplane mode where relevant.
- Test every user journey from install to the key action, such as sign-up, purchase or booking.
- Test permissions: what happens if a user says no?
- Test interruptions such as calls, notifications and switching apps.
- Test accessibility basics, such as readable text sizes and screen reader labels.
Beta testing with real people
- Apple provides TestFlight for distributing pre-release iOS builds to testers.
- Google Play Console offers internal, closed and open testing tracks for Android.
- Invite friendly customers, colleagues and a few people who do not know the app. Fresh eyes find the problems you have stopped seeing.
- Collect feedback in a simple form and fix the most serious issues first.
Performance and stability
- Check launch time, battery use and memory use.
- Review crash reports and fix top issues.
- Make sure production services, payment systems and notifications work with real credentials.
Check current rules: Google sometimes requires new personal developer accounts to complete a testing period with a minimum number of testers before production release. Confirm the current requirement in Play Console so it does not delay your launch.
Step 4: Build Your Store Listing
Your listing is your shop window. It affects whether people download your app, and also how easily they find it.
App name Short, memorable and relevant. Both stores limit length and discourage keyword stuffing. Check that the name is not already taken and does not infringe a trademark.
Subtitle or short description A one-line summary of the main benefit. Write for people first.
Full description
- Start with the value: what problem the app solves and for whom.
- Use short paragraphs and bullet points for key features.
- Be honest. Do not claim features the app does not have or mention competing platforms.
- Include a clear call to action and support details.
Keywords Apple offers a hidden keyword field, while Google uses text in your title and description. Research the words your customers would use, and use them naturally.
Icon Simple, recognisable and distinctive at small sizes. Avoid text-heavy icons.
Screenshots
- Show the real app in use, not abstract artwork.
- Lead with your strongest benefit in the first two or three images.
- Add short captions that explain what the screen does.
- Prepare the required sizes for each device type, following the stores’ current specifications.
Preview video (optional but powerful) A short video showing the key flow can boost conversion. Keep it under half a minute where possible and show the real app.
Category and tags Choose the category that best matches your app’s main purpose. Wrong categories reduce visibility and may trigger review questions.
Contact information Add a support email, a website and the privacy policy link. Make sure they all work.
Localisation If you serve more than one language or region, localise the listing as well as the app. This can improve visibility and trust in those markets.
Step 5: Submit to the Apple App Store
Process in outline:
- In App Store Connect, create a new app record with its name, language, bundle identifier and other basic details.
- Your developer uploads a build using Apple’s tools, and it appears in App Store Connect after processing.
- Fill in the listing: description, keywords, screenshots, support URL and privacy policy link.
- Complete the privacy details and age rating questionnaire.
- Add review information: a demo account if login is required, notes explaining unusual features and contact details.
- Choose pricing and availability by country.
- Select the build and submit for review.
- Choose whether to release automatically after approval, manually or on a scheduled date.
Tips for Apple:
- Write clear review notes that explain how to use the app, including how to reach protected areas. Reviewers are busy and may not figure out hidden features.
- Make sure the app is complete, with no broken links or placeholder content.
- Check that you are following Apple’s current design and content guidelines.
- Ensure features that need hardware, special locations or specific accounts can still be tested by the reviewer.
Step 6: Submit to Google Play
Process in outline:
- In Google Play Console, create a new app and set the default language, name, and whether it is free or paid.
- Complete the app content sections: privacy policy, ads declaration, app access (provide login details if required), content rating, target audience and data safety.
- Set up the store listing: description, graphics, screenshots and contact details.
- Upload your release in the form Google currently requires (an app bundle) to a testing track or to production.
- Add release notes.
- Complete any required testing steps for your account type.
- Review the release summary and fix any warnings or errors.
- Submit the release for review, then roll out in stages or to everyone.
Tips for Google:
- Use staged rollouts, for example releasing to a small percentage of users first and increasing as you confirm stability.
- Watch the pre-launch report and policy status pages in Play Console for automatic test results and issues.
- Take the data safety and permissions sections seriously, as inaccurate answers can cause rejection or removal.
- Keep your app targeting recent platform versions as Google requires, because outdated apps can lose visibility.
Understanding App Review
Both stores review apps before they go live, using a mix of automated checks and human reviewers.
What they check:
- Safety and legality: harmful, illegal or deceptive content and behaviour.
- Performance: crashes, bugs and incomplete features.
- Privacy: data collection, permissions and disclosures.
- Business model: payments, subscriptions and advertising rules.
- Design and quality: basic usability and minimum functionality.
- Intellectual property: using others’ names, logos or content without permission.
- Accuracy: whether your description and screenshots match the actual app.
How long does it take? Review times vary. Many apps are reviewed within a short period, but first submissions, sensitive categories and busy seasons can take longer. Plan for delays and avoid fixed marketing dates tied to the first submission.
Updates are reviewed too, though usually more quickly than new apps.
Common Reasons Apps Get Rejected
1. Crashes and bugs. The most common reason. Test on real devices before submission.
2. Incomplete or placeholder content. Empty screens, “lorem ipsum” text and broken links.
3. Missing demo access. Reviewers cannot log in, so they cannot test your app.
4. Misleading descriptions or screenshots. Showing features that do not exist, or using another brand’s name.
5. Missing or inadequate privacy policy. Not hosted, not accessible or not matching actual data use.
6. Inaccurate data disclosures. Saying you collect nothing when your analytics or ad tools collect data.
7. Unnecessary permissions. Requesting access you do not need, or not explaining why.
8. Payment rule violations. Selling digital content or subscriptions outside the required systems, or unclear subscription terms.
9. Minimum functionality. Apps that are just a website wrapper with little added value may be rejected, particularly on Apple’s store.
10. Copycat or spam apps. Apps that imitate others or exist only to push users elsewhere.
11. Account deletion missing. Apps that allow account creation without a way to delete the account in the app, where this is required.
12. User-generated content without safeguards. Apps with chat, posts or comments need reporting, blocking and moderation tools.
13. Intellectual property issues. Using trademarks, music, images or characters without rights.
14. Technical policy issues. Outdated platform targets or ignoring technical requirements published by the stores.
Prevent most of these by reading the current review guidelines early in the project and checking your app against them before you submit.
If Your App Is Rejected
Rejection is common and usually fixable.
- Read the message carefully. The reviewer states which guideline was violated and often gives details.
- Do not panic or argue emotionally. Respond professionally and factually.
- Fix the specific issue, not just the symptom. If the reviewer could not log in, provide a working account and clearer notes.
- Check related issues, since the same problem may exist elsewhere in the app.
- Resubmit with a short, clear explanation of what you changed.
- If you believe the decision is wrong, use the appeal or reply process politely and provide evidence.
- Track the history of rejections so the team learns what to avoid next time.
Build extra time into your launch plan for at least one round of review feedback.
Launch Day and the First Weeks
Before launch:
- Prepare your website landing page, with links to both stores.
- Prepare announcements for email, social media and your customers.
- Set up analytics and crash reporting.
- Prepare a support process and templates for common questions.
- Decide your release approach: all at once, or a staged rollout.
On launch day:
- Verify that the listing appears correctly in both stores.
- Download and test the live version on real devices.
- Check sign-up, payments and key features in production.
- Announce the app to your audience, and make it easy to leave honest reviews.
In the first weeks:
- Watch crash reports and user feedback closely.
- Reply to reviews, especially negative ones, professionally and quickly.
- Fix urgent bugs and release updates promptly.
- Track installs, activation and retention to learn what works.
- Ask early users what they like and what they find confusing.
Your website helps too. A dedicated app landing page with clear store links builds trust and supports search visibility. Our SEO services can help people find your app online, not just inside the stores.
After Launch: Updates and Maintenance
Apps need regular care.
- Operating system updates: Apple and Google release new versions every year, and apps must be updated to remain compatible.
- Bug fixes and security patches: respond quickly to issues.
- New features: based on real user feedback and data.
- Dependency updates: frameworks and libraries need regular upgrades.
- Policy changes: both stores update their rules, and you may need to change disclosures or features.
- Account and certificate renewals: keep memberships, certificates and domains current, since expired items can break updates or remove your app.
Set a maintenance routine and budget. An app that is not updated gradually loses visibility, ratings and users.
App Store Optimization Basics
App Store Optimization (ASO) is like SEO for app stores.
- Choose keywords that match what users search for, and use them naturally in your title, subtitle and description.
- Make your icon and screenshots persuasive, since most people decide from these.
- Encourage genuine ratings and reviews at the right moment, such as after a successful action, and never reward or fake them.
- Reply to reviews to show you care.
- Update regularly, as active apps tend to perform better.
- Localise your listing for key markets.
- Test variations of your screenshots and descriptions where the stores allow, and measure the results.
- Keep ratings healthy by fixing issues quickly.
ASO is ongoing. Revisit your listing every few months using real data.
Costs and Timelines to Plan For
We do not quote fees here because they change, so check the official pages. The cost categories to plan for are:
- Apple developer membership and Google registration fees.
- Design work for the icon, screenshots and listing graphics.
- Legal documents, such as a privacy policy and terms.
- Testing time and devices.
- Developer time for preparing builds, compliance and resubmissions.
- Optional paid promotion and a launch campaign.
- Ongoing updates, hosting and support.
Timeline tips:
- Start account setup early, ideally while the app is still being built, because verification can take time.
- Allow time for beta testing.
- Add buffer for review and one possible resubmission.
- Do not schedule big promotions until your app is approved and stable.
For a wider look at budgeting, see our mobile app cost guide.
Who Should Do What
You (the owner):
- Create and own the developer accounts.
- Provide the privacy policy, terms, branding and business details.
- Approve the listing text and screenshots.
- Supply a demo account, if needed.
- Make the final submission decision.
Your developer or agency:
- Prepare and upload builds.
- Configure app settings, permissions and SDKs correctly.
- List all data collected for privacy disclosures.
- Fix technical rejections.
- Support testing and release.
Your designer or marketer:
- Produce screenshots, icons and preview videos.
- Write the description and keywords.
- Plan the launch campaign.
If you do not have a team for this, our mobile app development services include store submission support.
Launch Checklist
Accounts and ownership
- Apple and Google developer accounts created in your name or company name
- Two-factor authentication on
- Developer added as team member with the right permissions
- Tax, banking and contact details complete
App readiness
- No crashes, placeholders or broken links
- Production services and credentials configured
- Account deletion available if accounts exist
- Permissions requested only when needed and explained clearly
- Demo account and review notes prepared
Legal and compliance
- Privacy policy published and linked
- Data disclosures accurate for both stores
- Age rating questionnaires completed honestly
- Payment and subscription rules reviewed
- Trademarks and content rights checked
Testing
- Tested on real iOS and Android devices
- Beta tested through TestFlight and Play testing tracks
- Critical bugs fixed
Listing
- Name, subtitle and description written
- Keywords chosen
- Icon and screenshots prepared
- Category and contact details set
- Support and website links working
Launch
- Release method chosen (immediate, scheduled or staged)
- Landing page and announcements ready
- Analytics and crash reporting active
- Support process in place
- Post-launch monitoring and update plan agreed
Frequently Asked Questions
Create a Google Play Console account, add a new app, complete the app content and data safety sections, build your store listing, upload your release to a testing or production track, and submit it for review. Staged rollouts let you release gradually.
It varies. Many reviews finish quickly, but first submissions, sensitive categories and busy periods can take longer. Allow extra time and do not tie fixed marketing dates to the first submission.
Both stores charge developer account fees, which change over time, so check the official pages. Other costs include design, legal documents, testing and developer time for submission and compliance.
Common reasons include crashes, incomplete content, missing demo access, misleading descriptions, privacy policy or data disclosure problems, unnecessary permissions and payment rule violations. The rejection message explains which guideline applies.
Yes, in most cases. Both stores require one if your app collects any user data, including through analytics and advertising tools. It must be publicly accessible and accurately describe your data practices.
Yes. You can publish on Apple, Google or both. Many businesses start on the platform most of their customers use, then add the other later.
TestFlight is Apple’s tool for distributing pre-release iOS builds to testers before the App Store release. Google Play offers internal, closed and open testing tracks for the same purpose.
You should. Register accounts under your name or company name and add your developer as a team member. This keeps control of your app and its future in your hands.
Yes. You submit a new version, which goes through review, usually faster than a first submission. Regular updates are important for compatibility, security and improvements.
ASO is the practice of improving your app’s listing, including title, keywords, icon, screenshots and reviews, to increase visibility and downloads in the stores.
Over time, it may stop working with new operating system versions, lose search visibility, collect poor reviews or be removed from stores if it no longer meets their requirements.
Final Thoughts
Getting an app into the stores is a project in itself, with accounts, legal documents, testing, listing design and a review process. The good news is that most problems are predictable. Start account setup early, own your accounts, write an honest privacy policy, test on real devices, prepare clear review notes and plan time for at least one round of feedback.
Treat launch as the beginning, not the end. The apps that succeed are the ones that listen to users, fix issues quickly and keep improving.
If you would like help taking your app from finished build to live in both stores, the Digital WebCraft team can guide you through accounts, compliance, listings and launch. Explore our mobile app development services, see our services, packages and portfolio, outline your app with the free AI Project Planner or book a free consultation.
Written by
Aamir Khan
As a Senior Web Developer at Digital Web Craft since June 2026, I focus on building scalable, high-performing web experiences. My role emphasizes innovative web development solutions, leveraging my skills in web application development and delivering meaningful results. With a Higher Diploma in Software Engineering from Aptech Learning, I bring a solid foundation in computer science to my work. My goal is to create impactful, user-centric digital solutions that align with organizational objectives while continuing to grow as a professional in web development.